入门
作者:jeremyjone
日期:2022-06-29
版本:1.0.2
版权:jeremyjone


通过入门的章节内容,可以快速了解、引入并使用 XGantt。
提示
这是 vue3 版本的 Gantt 组件,如果需要使用 vue2 版本,请移步 这里
演示
现已提供演示页面,如需要,请移步 演示页面。
十分重要
这个库是 jz-gantt 的 vue3 版本的继承库。如果您之前已经使用了 jz-gantt,则需要仔细阅读如下内容。
说明:
这个库的
1.0.1相当于jz-gantt@1.3.1。并且jz-gantt不再维护。
如何迁移
- 包名不同,
@xpyjs/gantt替换了jz-gantt。 - 所有以
j-或J的前缀全都更新为x-或X。
除此之外,无需其他改动。
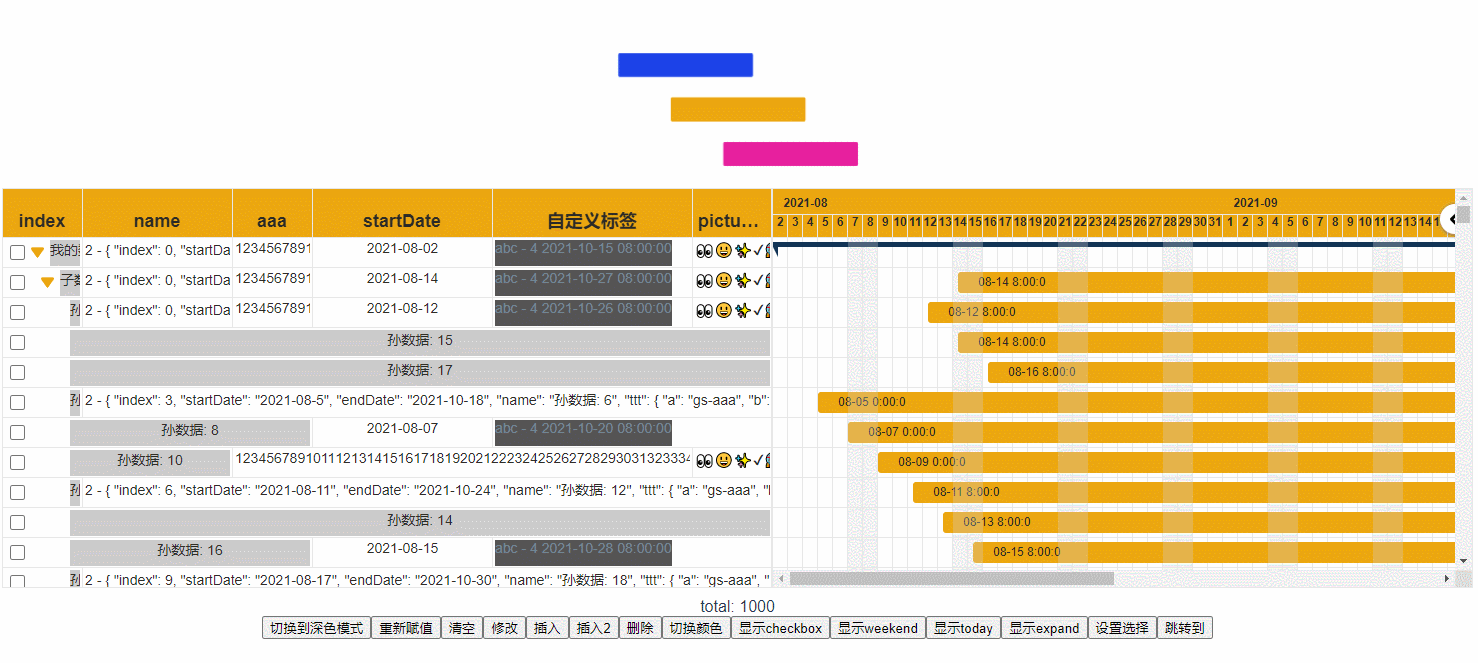
什么是 XGantt
XGantt 是一个基于 vue 的甘特图表插件,它包含常用的甘特图功能,如:
- [x] 根据日期自动生成甘特图
- [x] 支持多层扩展
- [x] 高性能
- [x] 多层联动
- [x] 多级选取
- [x] 支持自定义表内容
- [x] 支持自定义甘特内容
- [x] 支持自定义表头
- [x] 动态更新数据
- [x] 定制任意风格
- [x] 支持黑暗模式
- [x] 支持多种日期显示模式切换
- [ ] 更多持续更新
动图展示:
安装
使用 npm 安装:
yarn add @xpyjs/gantt
npm install @xpyjs/gantt --save
引入
XGantt 会被整体引入,引入的 Gantt 就是 XGantt 的根组件。同时需要单独引入样式表,方式如下:
import Gantt from '@xpyjs/gantt';
import '@xpyjs/gantt/dist/index.css';

createApp(App).use(Gantt).mount('#app');
使用
XGantt 需要一个数组形式的数据对象。例如,您拥有如下数据:
const dataList = reactive([
  {
    index: 1,
    startDate: '2020-06-05',
    endDate: '2020-08-20',
    ttt: {
      a: 'aaa',
      b: 'bbb'
    },
    name: 'mydata1',
    children: [] // children 是必须的,如果没有,给一个空数组即可
  },
  {
    index: 2,
    startDate: '2020-07-07',
    endDate: '2020-09-11',
    ttt: {},
    name: 'mydata2',
    children: [
      {
        index: 3,
        startDate: '2020-07-10',
        endDate: '2020-08-15',
        ttt: {
          a: 'aaa'
        },
        name: 'child1',
        children: [] // children 是必须的,如果没有,给一个空数组即可
      }
    ]
  }
]);
那么只需要在 html 中简单的使用 XGantt,即可创建一个甘特内容:
<x-gantt
  data-index="index" <!-- 请确保它存在 -->
  :data="dataList"
/>
如上操作之后,您将看到:
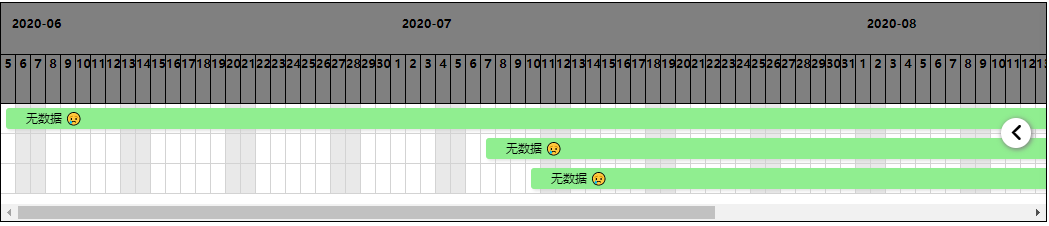
如果没有,请尝试重新操作。
如果它正常显示,请继续深入学习其他属性,以便更好的适应您的页面。
支持 TypeScript
XGantt 有完整的 TypeScript 类型声明文件。
如果您需要,只需要在使用中通过:
import {
  XGanttComponent,
  XGanttColumnComponent,
  XGanttSliderComponent
} from '@xpyjs/gantt';
按需导入使用即可。如:
